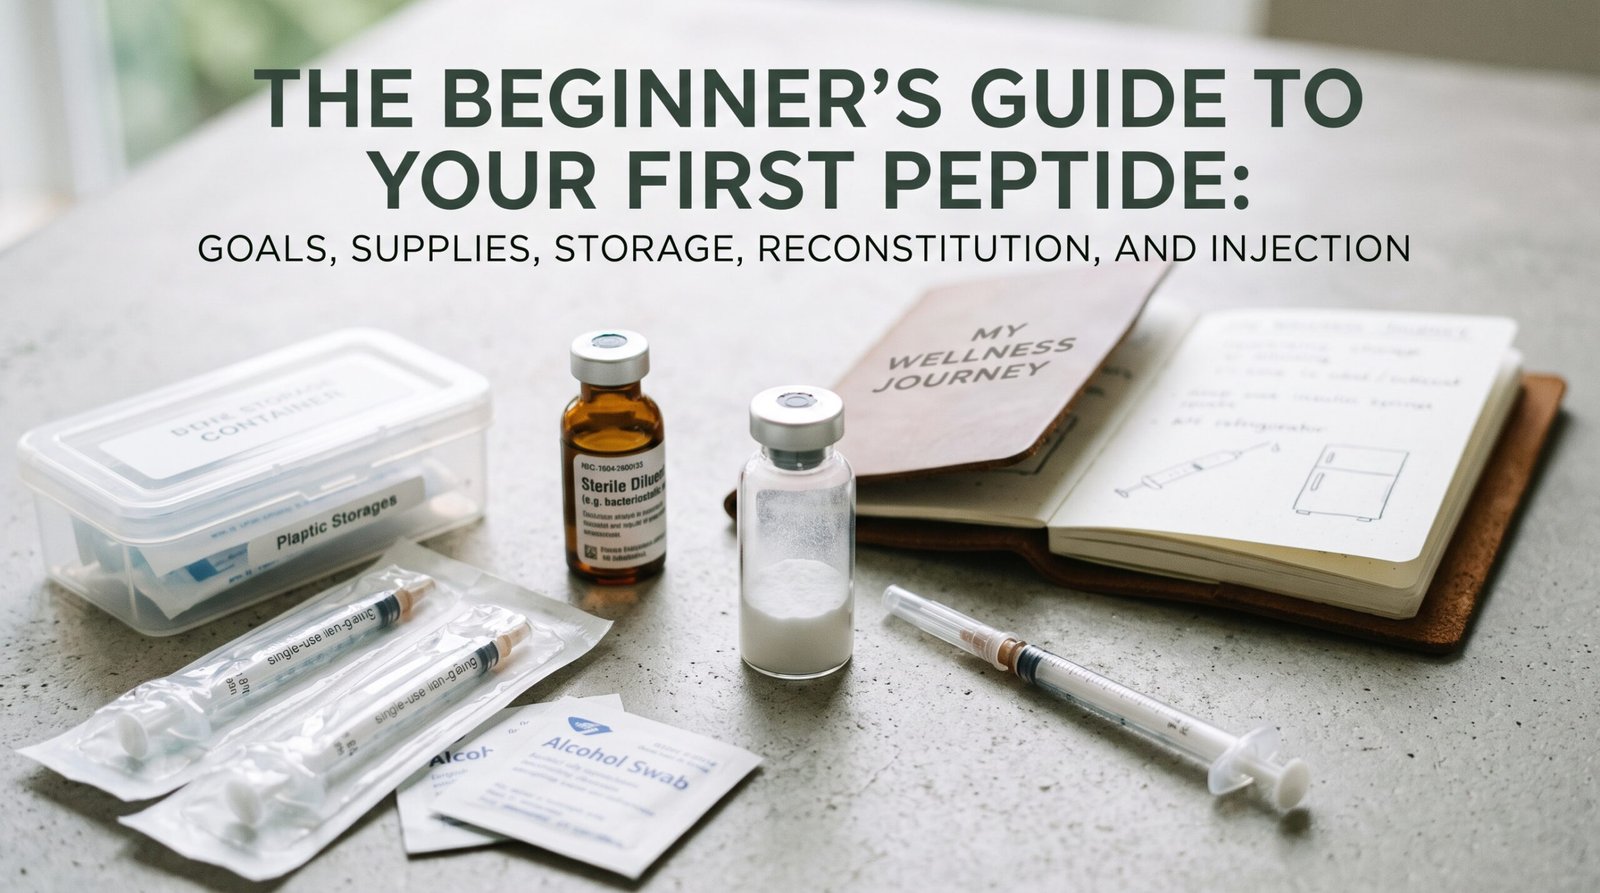
The Beginner's Guide to Your First Peptide: Goals, Supplies, Storage, Reconstitution, and Injection
Taking the step into your first peptide protocol often comes with an intimidating learning curve. Between unfamiliar scientific terminology, sterile syringes, calculations in micrograms, and strict cold-chain handling, it is easy for beginners to feel overwhelmed.
At their core, peptides are short biological chains of amino acids linked together by peptide bonds. Because they lack the rigid cellular walls of larger proteins, active peptides are delicate molecules that require clean handling, accurate diluent measurement, and proper temperature storage to stay viable. Once you understand the fundamentals, preparing and administering your first compound becomes a straightforward, predictable, and safe routine.
Quick Summary: First Peptide Guide for Beginners at a Glance
Quick Answer: Starting your first peptide protocol requires focusing on a single research pathway, assembling sterile consumables (bacteriostatic water, alcohol pads, EasyTouch 31G Syringes, and a Peptide Vial Case), maintaining proper cold-chain storage (-20°C dry or 2°C to 8°C liquid), executing controlled reconstitution (using instructions from our How to Reconstitute Peptides Guide), and mastering clean subcutaneous injection mechanics.
| Peptide in Vial | BAC Water Added | Potency Per Syringe Unit (U-100) | Syringe Units for 250 mcg | Syringe Units for 500 mcg |
|---|---|---|---|---|
| 5,000 mcg (5 mg) | 1.0 mL (100 units) | 50 mcg / unit | 5 units | 10 units |
| 5,000 mcg (5 mg) | 2.0 mL (200 units) | 25 mcg / unit | 10 units | 20 units |
| 5,000 mcg (5 mg) | 2.5 mL (250 units) | 20 mcg / unit | 12.5 units | 25 units |
| 10,000 mcg (10 mg) | 2.0 mL (200 units) | 50 mcg / unit | 5 units | 10 units |
1. Defining Your Goals and Dosage Considerations
Before handling any research compound, clarify your primary endpoint. Beginners often make the mistake of attempting complex "stacks" right away, combining three or four compounds before understanding how their system reacts to a single peptide.
- Focus on a Single Pathway: Select an entry point aligned with one clear goal—such as localized tissue repair using BPC-157, natural endocrine and sleep support using Ipamorelin or Sermorelin, or metabolic modulators like our GLP-1 Comparison Guide.
- Start Low and Titrate Slowly: Always initiate a protocol at the lowest conservative evaluation dose to observe individual tolerance, potential histamine responses, or localized skin sensitivity.
- Establish Baseline Biomarkers: Run comprehensive baseline blood panels (e.g., CMP, CBC, fasting blood glucose, and compound-specific markers like IGF-1 or thyroid metrics) before starting. This provides an objective baseline rather than relying on subjective observation.
- Verify Quality and Purity: Insist on a third-party Certificate of Analysis (COA) confirming that the batch exhibits high-performance liquid chromatography (HPLC) purity of 98% or higher and mass spectrometry verification (learn How to Read a Peptide COA).
2. Essential Supplies You Will Need
Before starting your protocol, assemble all necessary hardware and consumables in advance. Trying to mix or inject without the correct equipment leads to contamination and dosing mistakes:
- Lyophilized Peptide Vial: Your active freeze-dried compound, verified by third-party HPLC testing.
- Pharmaceutical-Grade Diluent: Genuine Bizer Hospira Bacteriostatic Water preserved with 0.9% benzyl alcohol to stop microbial proliferation in multi-dose vials (or alternatively 0.9% Sterile Bacteriostatic Saline).
- Injection Syringes: Ultra-fine, single-use EasyTouch 31G Syringes (0.3 mL or 0.5 mL capacity) for precise subcutaneous micro-dosing and minimal tissue disruption.
- Diluent Draw Syringes (Optional but Helpful): A standard 3 mL sterile mixing syringe with a 21G to 25G needle for transferring bacteriostatic water into your peptide vial quickly and smoothly.
- Alcohol Prep Pads: Individually wrapped 70% isopropyl alcohol wipes for sanitizing rubber vial stoppers and the injection site.
- Protective Storage: A dedicated, cushioned Peptide Vial Case or a Compact Peptide Travel Case to shield fragile glass vials from light, drops, and continuous refrigerator door movement.
- Sharps Disposal Bin: A puncture-resistant, FDA-cleared sharps container to safely discard used needles.
3. How Peptides Arrive & How to Store Them Safely
Peptides do not arrive in liquid form. In liquid solutions, water molecules gradually cleave peptide bonds over time through hydrolysis. To ensure maximum stability during transit and storage, peptide manufacturers use a process called lyophilization (freeze-drying).
When your vial arrives, you will see a dry, white puck, cake, or crystalline powder at the bottom of a sealed glass container. Protecting this powder from heat, light, and moisture ensures it retains maximum potency throughout its entire shelf life:
- Unreconstituted (Dry Powder) in the Refrigerator: Unmixed, lyophilized peptide vials can safely sit refrigerated between 2°C and 8°C (36°F to 46°F) for roughly two years without meaningful degradation.
- Unreconstituted (Dry Powder) in the Freezer: For deep long-term storage, keeping unmixed vials frozen at -20°C (-4°F) extends their structural stability well beyond two or more years.
- Reconstituted (Liquid) Storage: Once you add liquid diluent to the vial, store it strictly in the refrigerator between 2°C and 8°C (36°F to 46°F) (learn more in our guide on Freezing Reconstituted Peptides).
- Reconstituted Solution Longevity: While commercial product labels often cite a standard 28-day window for pharmacy sterility guidelines (matching standards in How Long Is BAC Water Good For?), properly reconstituted peptides that are kept clean, refrigerated, and uncontaminated reliably hold their potency for much longer—frequently up to 60 days.
- Never Freeze Liquid Peptides: Unlike dry powder, liquid peptide solutions must never be placed in a freezer. Freezing creates microscopic ice crystal shears that physically slice through fragile amino acid chains, permanently ruining the solution.
- Protect from Light and Motion: Ultraviolet light oxidizes sensitive amino acids, and continuous vibrations disrupt tertiary folding structures. Keep your vials inside a cushioned, light-blocking Peptide Vial Case on an interior refrigerator shelf rather than on the rattling refrigerator door.
4. The Step-by-Step Reconstitution Process
Reconstitution is the simple process of adding a liquid diluent to your dry lyophilized cake to transform it into an injectable solution.
The standard diluent is pharmaceutical-grade Bacteriostatic Water (sterile water preserved with 0.9% benzyl alcohol). Never use plain sterile water for a multi-dose peptide vial; without an antimicrobial agent like benzyl alcohol, plain water turns into a breeding ground for bacteria after the first needle puncture.
The Core Math: Mass vs. Volume
The most common beginner misunderstanding is believing that adding more water reduces the total amount of peptide in the vial. Diluent volume alters concentration, not total mass.
Remember: 1 mg = 1,000 mcg. A 5 mg vial contains exactly 5,000 mcg of active peptide whether it is dissolved in 1 mL, 2 mL, or 3 mL of liquid. Adding less water makes the solution more concentrated (higher mcg per syringe tick); adding more water makes it easier to draw precise smaller doses.
To eliminate manual conversion guesswork, calculate your parameters instantly using our free Peptide Calculator and track your schedule in the Protocol Tracker Tool.
Mixing Protocol
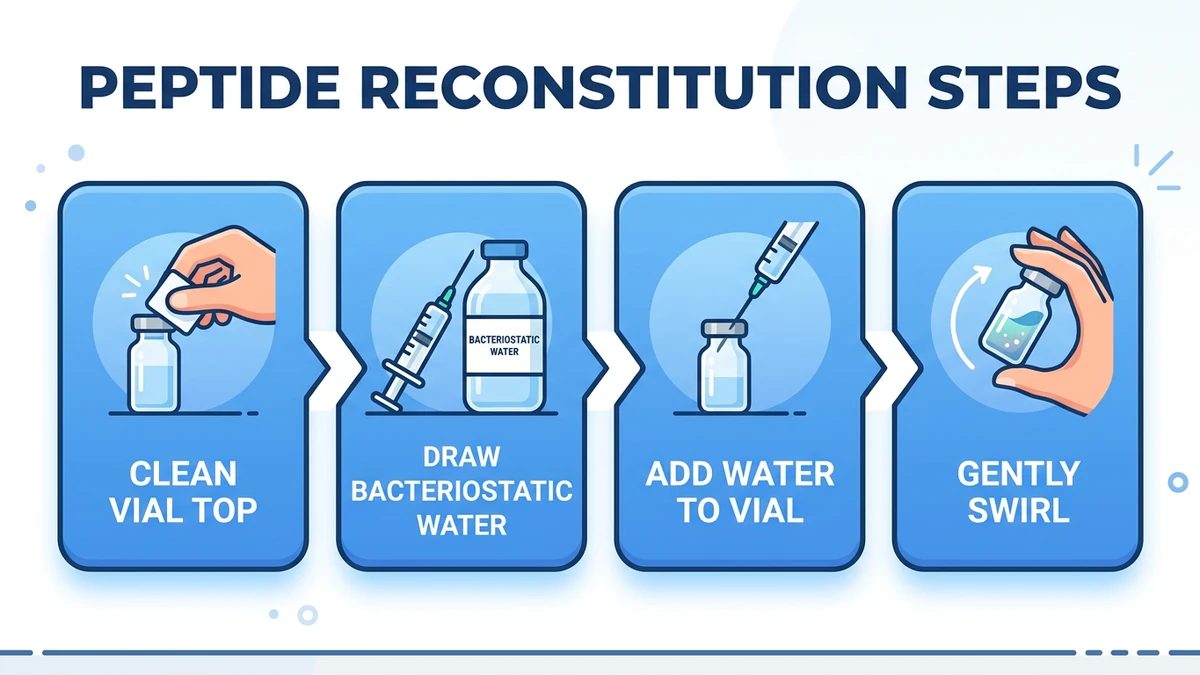
- Pop the protective plastic flip-caps off both your peptide vial and the bacteriostatic water vial.
- Disinfect both exposed rubber septums with a fresh 70% isopropyl alcohol wipe and allow them to air-dry completely.
- Draw your target volume of air into a sterile syringe, inject it into the bacteriostatic water vial to equalize internal pressure, and smoothly draw out your measured diluent volume.
- Angle the needle against the inside glass wall of the peptide vial. Let the water trickle slowly down the glass. Peptides are vacuum-sealed (manage vacuum pressure as detailed in Peptide Reconstitution Vacuum), so maintain firm thumb pressure on the plunger to prevent the vacuum from slamming the water violently onto the powder.
- Swirl, never shake: Once the fluid is transferred, gently roll the vial between your palms or swirl it softly until the powder is fully dissolved and crystal clear. Shaking generates mechanical shearing force that denatures delicate protein bonds.
5. Cleaning the Area & Subcutaneous Injection Technique
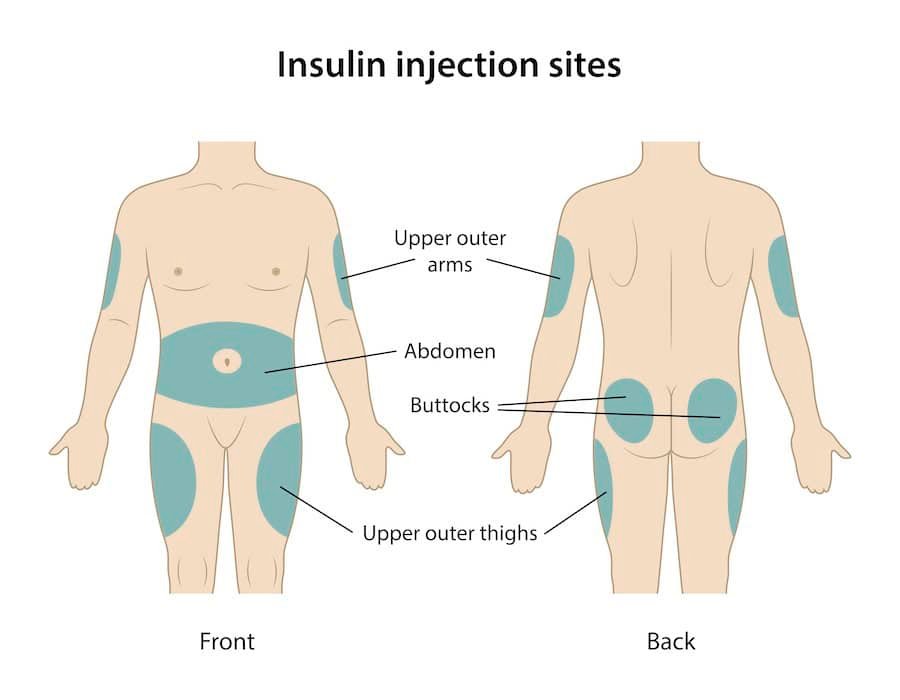
Nearly all systemic research peptides are administered via subcutaneous (SubQ) injection—delivering the fluid into the layer of adipose (fatty) tissue situated right under the skin.
Aseptic Workspace Preparation
Infections and localized welts almost always trace back to poor hygiene. Set up an aseptic workflow before unboxing any sharps:
- Wash your hands thoroughly with warm water and soap for at least 20 seconds.
- Disinfect a clean countertop using a sanitizing wipe or 70% alcohol.
- Lay out your reconstituted peptide vial, sterile alcohol swabs, an FDA-cleared sharps bin, and a fresh EasyTouch 31G Syringe (select proper gauge and length guidelines from our Needle Gauge & Length Guide).
Where and How to Inject
- Choose an Injection Site: The preferred site is the abdomen, at least two inches away from the belly button in any direction. The outer upper thigh is a reliable secondary alternative.
- Disinfect the Skin: Firmly wipe the target skin site with a fresh 70% alcohol swab in an outward circular motion. Let the skin dry completely before injecting; inserting a needle through wet alcohol causes unnecessary burning and stinging.
- Draw Your Dose: Swab the peptide vial rubber stopper again. Insert your 31-gauge insulin syringe, invert the vial, and draw back your exact calculated unit dose, tapping gently to clear any tiny air bubbles.
- Administer the Shot: Gently pinch an inch of skin between your thumb and forefinger to isolate the subcutaneous fat. Insert the ultra-fine needle at a 45-to-90-degree angle, smoothly depress the plunger all the way down, pause for 2 to 3 seconds, and withdraw smoothly.
- Rotate Sites Consistently: Never inject the exact same spot consecutively. Systematically rotate quadrants across the abdomen or alternate between thighs to avoid developing lipoatrophy or firm scar tissue under the skin. (Review potential skin reactions in our Peptide Injection Site Welt Guide).
6. Critical Mistakes Beginners Must Avoid
Avoiding these fundamental errors preserves peptide potency and prevents adverse injection reactions:
- Never Reuse Needles ("One and Done"): Every needle is strictly single-use. Piercing a rubber stopper or skin immediately dulls the microscopic bevel, causing tissue micro-tears on repeated use. More critically, reusing needles breaks sterility and introduces bacteria directly into your vials or bloodstream. Use a fresh syringe every single time.
- Double-Dipping Used Needles into Diluent: Never insert a syringe that has entered a peptide vial or touched skin back into your clean master bottle of bacteriostatic water. This cross-contaminates your entire diluent supply with foreign residues and microbes.
- Injecting Cloudy or Discolored Solutions: Standard water-soluble peptides (like BPC-157 or CJC-1295) should dissolve crystal-clear like water. If the solution appears hazy, milky, or contains floating particulates, the peptide has either fallen out of solution, denatured, or sustained bacterial contamination (troubleshoot cloudy states in Cloudy Peptide After Mixing). Discard it immediately. *(Note: specific hydrophobic peptides like AOD-9604 or IGF-1 LR3 require dilute acetic acid to clear natural turbidity).*
- Mixing Oil-Based and Water-Based Compounds: Never attempt to draw oil solutions (such as testosterone) and water-based peptides into the same syringe. Oil and water do not mix, and co-injecting them impairs consistent subcutaneous absorption.
- Improper Sharps Disposal: Never discard used needles directly into ordinary household trash cans or recycling bins. Always dispose of used syringes immediately into a rigid, puncture-resistant, FDA-cleared sharps container.
Starting your first peptide journey does not have to be complicated. By assembling the right supplies upfront, starting with one targeted compound, checking third-party HPLC testing, keeping unmixed vials cold for years, and respecting basic reconstitution math with our Peptide Calculator, you will protect both the physical viability of your peptide and your personal safety. Aseptic technique, single-use needle discipline, and clean consistency remain the foundational rules for every protocol. Explore our full Blog Archive for more guides.
← View all peptide guides, research & protocols in our Blog Archive